Drone 3D Model: How to Create 3D Models With a Drone
BY Zacc Dukowitz
8 April 2026A drone 3D model is a 3D model made with drone data.
Today, these models are used in a range of ways, including inspections, mapping and site documentation, construction progress tracking, volume measurements, and shareable “digital twin” style visualizations.
Most drone 3D models are made with:
- Photogrammetry, using lots of overlapping photos processed into a 3D model.
- LiDAR data, using laser scans that produce a dense point cloud and measurement-friendly geometry
But there are a lot of other ways you can make them, which we’ll go into below.
We’ll also cover how to make a drone 3D model, drone and software recommendations, and how to deliver 3D models to clients so they can actually open them.
Here’s a menu of everything we cover in this guide:
- What Is a Drone 3D Model?
- Photogrammetry vs. LiDAR
- How to Make a Drone 3D Model
- Drone Photogrammetry 3D Models Step-by-Step
- Drone LiDAR 3D Models Step-by-Step
- Drone 3D Model Delivery
- 6 Common Problems with Drone 3D Models + What To Do
- Want to Download a 3D Model of a Drone?
- Drone 3D Model FAQ
[Looking to download a 3D model for making a drone? Jump to a quick checklist and starting points.]
What Is a Drone 3D Model?
A drone 3D model is a three-dimensional digital representation of a real place, structure, or object made from data captured by drone.
In practice, it’s a deliverable that lets you see and measure the shape of a site in 3D.
3D models made with drone data are used in a wide range of industries. The value of the model really depends on the need: some teams want a photo-real model they can move and add notes to, while others care most about geometry and measurement.
A key point: “3D model” is an umbrella term.
3D modeling software may make a textured mesh, a point cloud, or an immersive view that looks 3D but isn’t a traditional mesh deliverable.
The right choice starts with this question: do you need a model primarily for viewing, or for measurement and downstream engineering work?
Types of Drone 3D Models
There are several ways you can use drones to make 3D models. And the models will be different depending on the method you use.
The main types of drone 3D models are:
1. Photogrammetry mesh models
These models are built from lots of overlapping photos. This process typically produces a textured mesh, and it’s often the most “photo-real” looking result.
2. LiDAR-based 3D models

These models are made from laser returns. This approach typically produces a dense point cloud first, with meshes derived later as needed.
3. NeRF / 3D gaussian splatting scenes
These models are built from many images (often video frames) to create an immersive, viewable 3D-like scene that can look extremely realistic for review and visualization.
Here are other, less common ways you can make a drone 3D model:
- Visual SLAM/VIO reconstructions: real-time 3D mapping primarily for navigation or quick situational models.
- Stereo/depth camera outputs: depth from stereo or time-of-flight sensors, usually for close-range or robotics-style mapping.
- Radar/SAR-derived elevation models: specialized applications, not typical commercial deliverables.
- Manual/CAD modeling from drone references: humans build simplified models using drone imagery as reference.
What Do You Actually Get?
Because “3D model” is such a general term, it can refer to a lot of different types of deliverables.
So what does a client actually expect to get when they ask for a 3D model?
Here are the main types of outputs people mean when they use the term:
| Output | Best for | Things to be aware of |
|---|---|---|
| Textured mesh | Visual sharing, presentation, general inspection | Can look great but still be inaccurate if capture/control is weak |
| Point cloud | Measurement workflows, engineering handoff, advanced analysis | Heavier files; needs the right viewer/software |
| Orthomosaic / surface models | Mapping context (often requested alongside 3D) | Clients may ask for these even when they say “3D model” |
Photogrammetry vs. LiDAR
Most drone 3D models are made with photogrammetry, but drone LiDAR can also produce excellent 3D results.
But the two methods don’t directly compete:
- Photogrammetry often wins on photo-real texture and simplicity.
- LiDAR often wins on reliable geometry in difficult scenes.
How Photogrammetry Works
Drone photogrammetry reconstructs a shape by matching features across lots of overlapping photos.
When capture is consistent, it can produce a detailed textured mesh that’s easy for clients to understand visually.
It’s especially strong when surfaces have texture—brick, gravel, roofing, terrain—and lighting is stable.
How Drone LiDAR Works
Drone LiDAR collects laser returns to build a highly detailed point cloud, which is often the core deliverable for measurement workflows.
You can generate meshes from LiDAR point clouds, but the workflow is usually geometry-first rather than photo-real-first.
LiDAR can be a better fit in low-texture areas, complex vegetation, and conditions that make imagery harder to match.
How to Decide
Use this if / then chart to help you choose between the two methods:
| If you . . . | Choose this method | Why it fits | Best for | Watch-outs |
|---|---|---|---|---|
| Want a photo-real, client-friendly 3D model for documentation, presentation, or general inspection | Photogrammetry | Uses overlapping photos to build a textured mesh, which usually looks the most “real” to stakeholders | Shareable visuals, site context, presentations, basic inspection review | Struggles with water/glass/glossy surfaces, thin vegetation, and inconsistent lighting or blur |
| Want measurement-first 3D data, especially in complex environments (vegetation, low texture, difficult lighting) | LiDAR | Captures geometry directly as a dense point cloud, which is typically more reliable for measurement workflows | Engineering workflows, complex terrain/vegetation, geometry-focused deliverables | Often less “photo-real” unless combined with imagery; heavier files and more specialized processing |
| Aren’t sure what the client actually wants | Ask first | One question prevents the wrong capture plan and the wrong deliverable | “Is success a model that looks real, or a model that supports reliable measurements?” | |
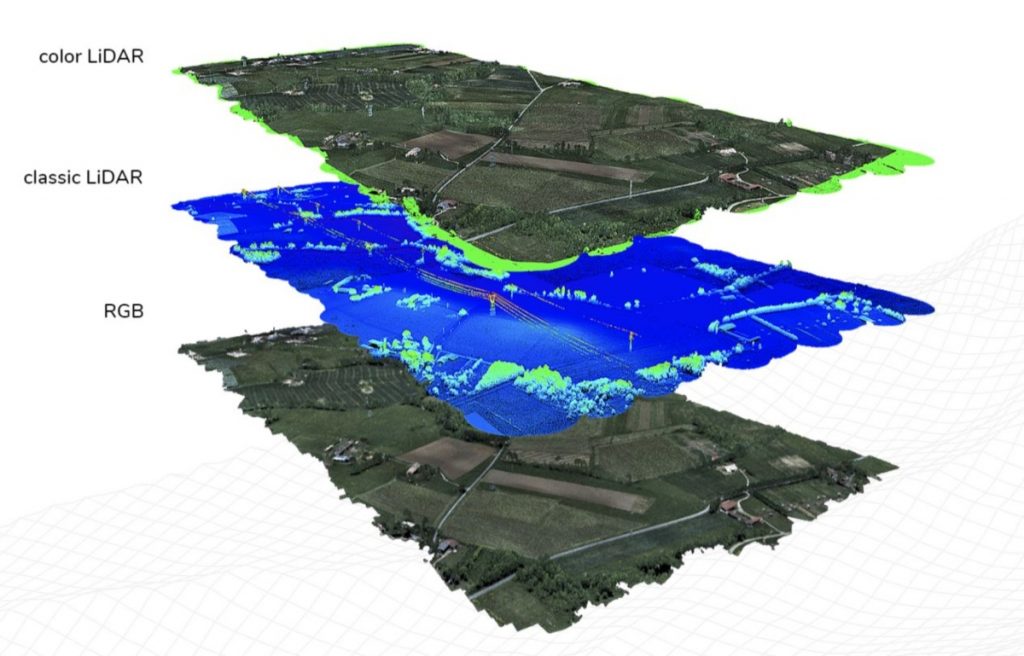
An illustration of visual and LiDAR data layers for drone mapping
How to Make a Drone 3D Model
Before you think about flight patterns or processing settings, make sure you have the basics covered.
A drone 3D model job will go smoothly when you’re clear on the deliverable, you can legally and safely access the site, and your gear and software match the expected workflow.
Universal Needs, Regardless of Method
These three steps apply regardless of the method you choose:
1. Define the Deliverable
Start by defining the deliverable in plain language. Are you handing over something primarily for:
- Viewing—i.e., a photo-real model that’s easy to review
- Measurement—data intended for analysis or engineering workflows
This one detail affects everything you’ll do, from capture planning to the files you export.
2. Confirm Site Access and Permissions
You’ll want a safe launch/landing area, a plan for people and moving equipment, and enough time on-site to complete consistent passes without rushing.
Visual blockers—trees, overhangs, tight spaces—matter for any 3D method, because missing coverage becomes missing geometry.
3. Plan the Flight
Make sure to do airspace checks, get authorizations if needed, do a compliance review, and create a safe flight plan.
For Photogrammetry
For drone photogrammetry, you need:
- A drone and camera that can capture consistently sharp images and a setup that supports repeatable coverage.
- Photogrammetry-capable software (cloud or desktop) and a practical plan for processing time.
The biggest quality jump with photogrammetry comes from consistency—steady speed, steady altitude, steady camera angle—not from chasing specs.
If you’re delivering to a client, assume you’ll export both a high-quality master and a shareable version that’s easy to open.
We’ll cover the step-by-step process for creating a 3D model using photogrammetry by drone in the next section.
For LiDAR
For drone LiDAR, you’ll need:
- A drone that can carry a LiDAR payload, the LiDAR payload itself, and an integrated positioning workflow (typically GNSS/IMU as part of the sensor system)*
- A processing toolchain that supports LiDAR data handling, including import, cleaning, and deliverable export
*The reason you’ll need the positioning workflow is that LiDAR deliverables are usually point-cloud-first, and are commonly used for geometry and measurement.
Plan for heavier files, more storage, and a clearer agreement on what the client expects: a raw point cloud, a cleaned/classified point cloud, or a derived model that’s easier to view.
We’ll cover the step-by-step process for creating a 3D model using LiDAR by drone below, after the photogrammetry section.
Drone Photogrammetry 3D Models Step-by-Step
Photogrammetry builds a 3D model by matching features across lots of overlapping photos.
It’s the go-to workflow when you want a model that looks realistic, is easy for clients to understand, and doesn’t require specialized sensors.

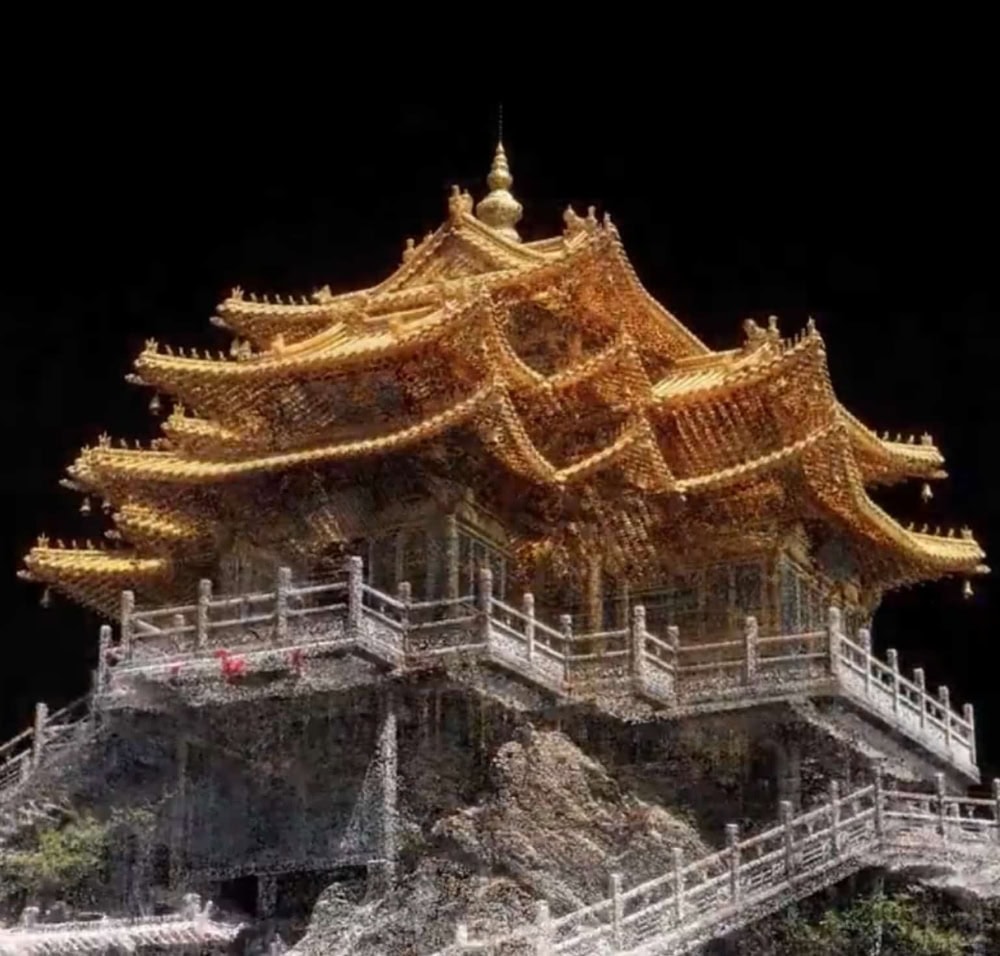
A 3D model made with drone photogrammetry for disaster response
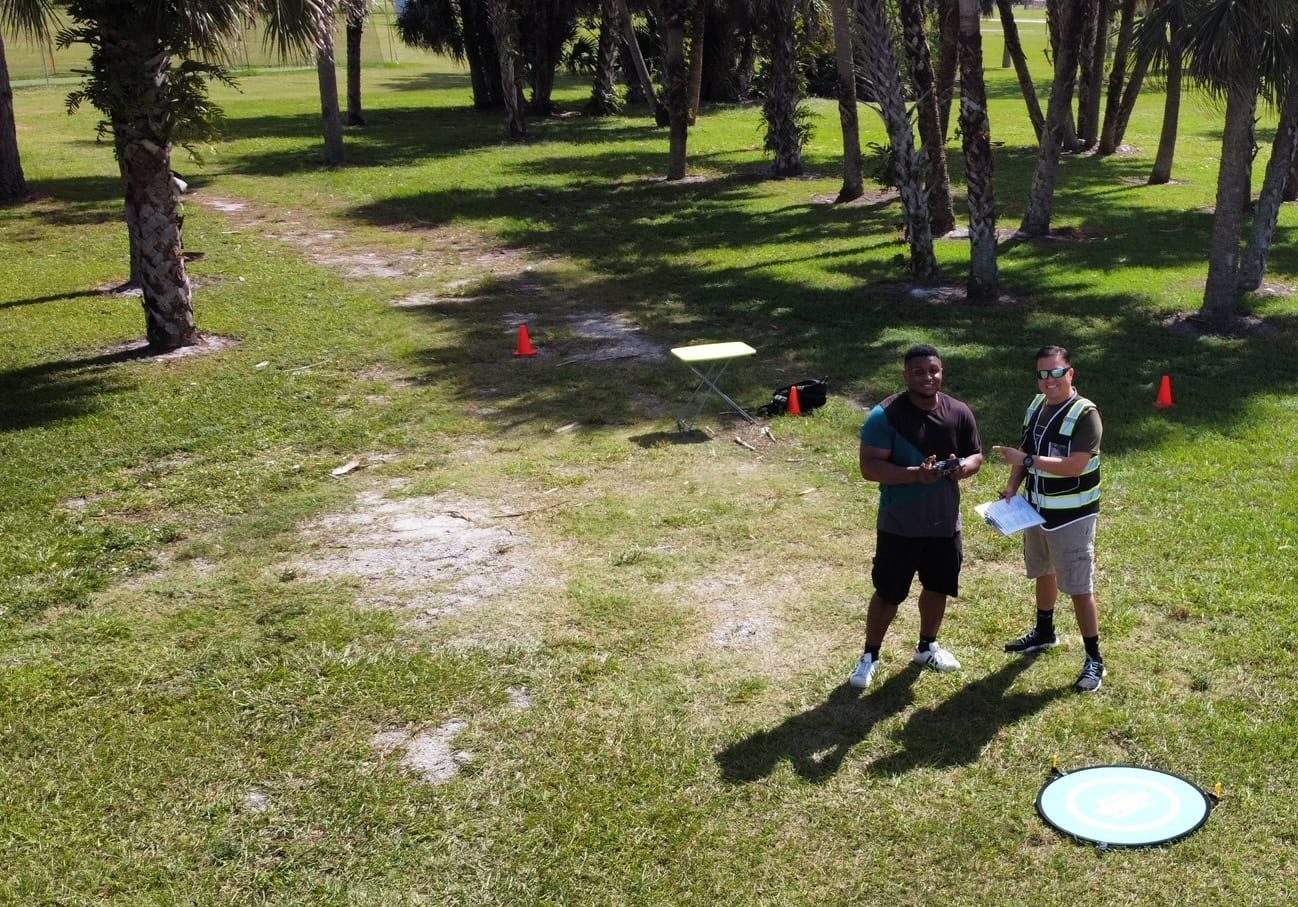
Capture Setup for Photogrammetry
The goal with photogrammetry is fairly simple: capture sharp images with consistent spacing and angles so the software can reliably “solve” depth.
If your drone supports it, use a mapping/mission planning mode so speed, altitude, and line spacing stay consistent.
If you can control camera settings, prioritize sharpness, since motion blur is one of the fastest ways to ruin a dataset.
If you can’t, fly slower in calmer conditions and capture more images rather than fewer.
Top Photogrammetry Drones
Here are three reliable platforms for doing drone photogrammetry:
1. DJI Mavic 3 Enterprise

Credit: DJI
The Mavic 3E is a compact mapping workhorse with a mechanical shutter and optional RTK module support, which makes it a strong fit for consistent photo capture and repeatable mapping missions.
It’s a great choice when you want high-quality outputs without stepping up to a larger airframe.
- Why it’s a fit. Mechanical shutter helps reduce distortion in mapping capture
- RTK note. Supports an RTK module for higher positioning precision (workflow-dependent)
- Best for. Small-to-mid sites, quick setup, repeatable missions
2. DJI Matrice 350 RTK

Credit: DJI
The Matrice 350 RTK is an enterprise platform built for repeatable operations, longer missions, and professional mapping workflows.
It’s the right direction when you want more endurance, more resilience, and room to grow into heavier sensors or more demanding jobs.
- Why it’s a fit. Enterprise-grade stability and mission capability
- Best for. Larger sites, more flight time, scalable operations
- Upgrade path. Supports payload ecosystems (including LiDAR options)
3. Freefly Astro

Credit: Freefly
Astro is designed as a commercial mapping platform, with an ecosystem built around professional payloads and operational reliability.
It’s a solid pick if you’re building a mapping business and want a platform that supports more advanced workflows over time.
- Why it’s a fit. Mapping-oriented platform and payload ecosystem
- Best for. Professional teams, scalable mapping operations
- Things to know. Platform selection often ties to payload and software stack choices
How to Capture Photos for Photogrammetry
Photogrammetry succeeds when the software sees the same features over and over from slightly different positions. Plan predictable coverage and don’t rush the pattern.
Here are best practices to follow:
- For broad areas and terrain, a grid with mostly top-down (nadir) photos is often enough.
- For buildings and anything with vertical surfaces, add obliques so walls aren’t under-covered.
- Keep flight execution consistent: steady speed, steady altitude, and a stable camera angle across passes.
If you’re deciding where to spend extra time, spend it on coverage of the surfaces that matter—especially vertical faces, under eaves, and areas that can be easily missed.
Drone Photogrammetry Software
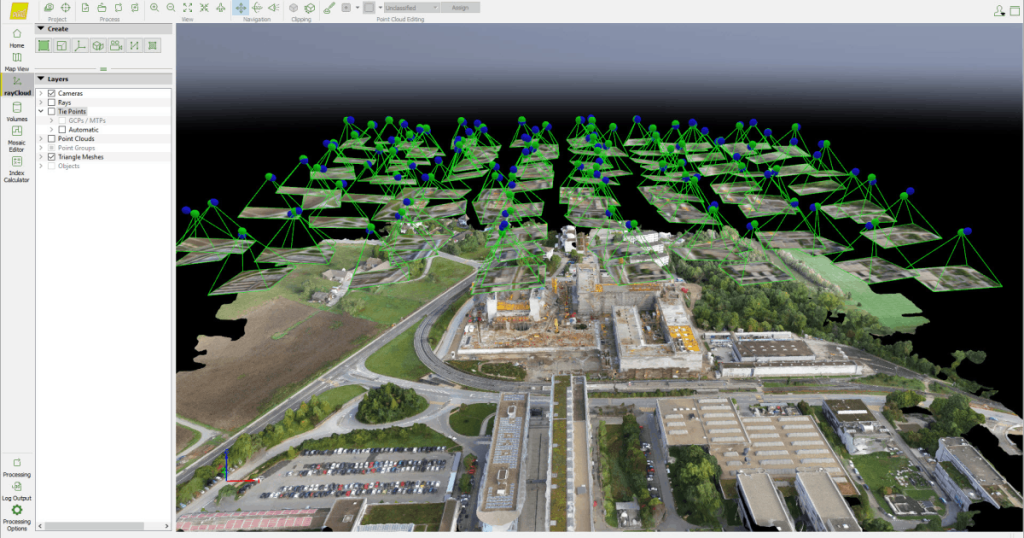
Most photogrammetry workflows follow the same pipeline: import your images, align/register the cameras, build a dense reconstruction, then generate outputs like a textured mesh, or sometimes a point cloud.
The biggest quality wins come from:
- Removing obviously blurry images before processing
- Doing a quick quality check for things like holes, warped edges, or stretched textures before you export.
Software options range from cloud platforms that prioritize speed and sharing, to desktop tools that give you more control.
Here are some of the top software options for creating drone 3D models with photogrammetry:
1. DroneDeploy
DroneDeploy is built for fast processing and easy sharing, which makes it a strong fit for client-facing deliverables and repeatable site workflows.
It’s usually the easiest route when you want an end-to-end platform and collaboration features.
- Best for. Quick turnaround and stakeholder sharing
- Things to know. Cloud-first workflow; cost scales with usage
- Good fit if. You want “upload → deliverable” simplicity
2. Pix4D
Pix4D is widely used in professional mapping and offers a more technical, controllable workflow than most one-click tools.
It’s a good fit when you want repeatability and the ability to tune outputs.
- Best for: pro mapping workflows and controlled processing
- Things to know: steeper learning curve than most cloud platforms
- Good fit if: you need consistency across many projects
3. Agisoft Metashape
Metashape is a powerful desktop photogrammetry tool with deep control over processing steps and outputs.
It’s a common choice when you want a flexible, configurable pipeline rather than a platform-style experience.
- Best for. Advanced control and configurable workflows
- Things to know. Settings and workflow require time to learn
- Good fit if. You want to tune quality and troubleshoot deeply
4. RealityScan / RealityCapture
This ecosystem is often used for high-quality reconstructions and asset-style outputs from imagery.
It can work well with drone datasets when image quality is strong and you’re prioritizing visual detail.
- Best for. High-detail reconstructions and visual quality
- Things to know. Results depend heavily on clean capture and coverage
- Good fit if. The deliverable is primarily visual
Drone LiDAR 3D Models Step-by-Step
Drone LiDAR creates 3D from laser returns and typically produces a dense point cloud as the primary deliverable.
It’s often used when geometry and measurement reliability matter most—especially in vegetation, low-texture scenes, or environments where imagery is harder to match.
Capture Setup for LiDAR
With LiDAR, think in terms of coverage and point density rather than photo overlap. Your job is to scan the surfaces that matter from enough angles to reduce shadows and occlusions in the point cloud.
Consistent speed and altitude still matter, but mission planning often focuses more on line spacing, scan geometry, and ensuring vertical faces get “seen”—which may require multiple passes or varied viewpoints.
Because LiDAR deliverables are point-cloud-first, it’s especially important to align the capture plan to what you’re delivering: raw point cloud, cleaned/classified point cloud, and/or a derived mesh.
Top LiDAR Drones
Here are three reliable platforms for doing drone LiDAR:
1. DJI Matrice 350 RTK + Zenmuse L2
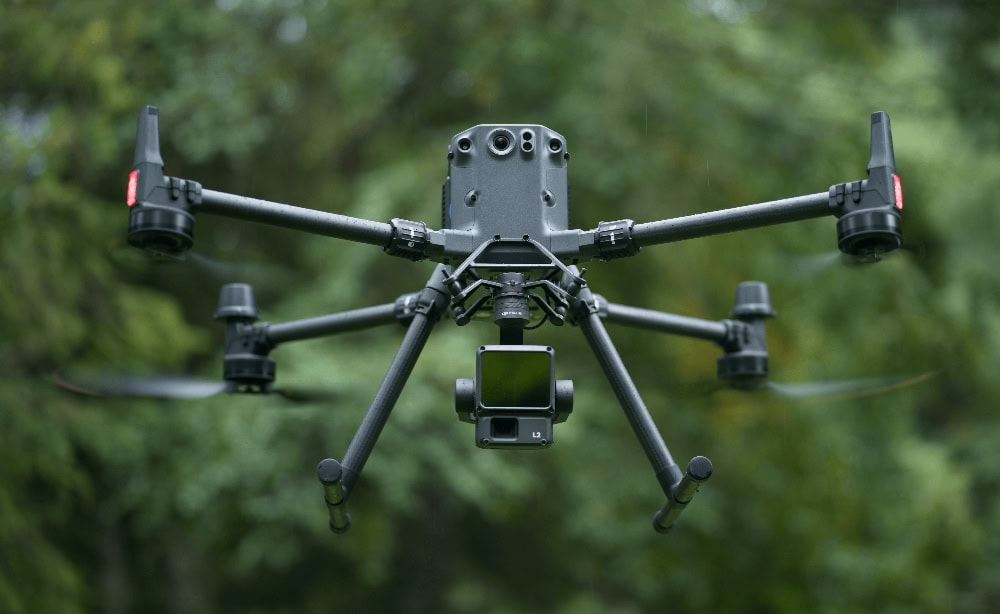
Credit: DJI
This is one of the most common integrated LiDAR workflows in the DJI ecosystem.
Zenmuse L2 integrates LiDAR, IMU, and an RGB mapping camera, and it’s compatible with both the Matrice 350 RTK and the Matrice 300 RTK.
- Why it’s a fit. Integrated enterprise workflow (payload + supported aircraft)
- Best for. Geometry-first deliverables, vegetation/low-texture environments
- Things to know. Confirm mounting and firmware requirements for mapping accuracy
2. Freefly Astro + ROCK Robotic R3 Pro V2
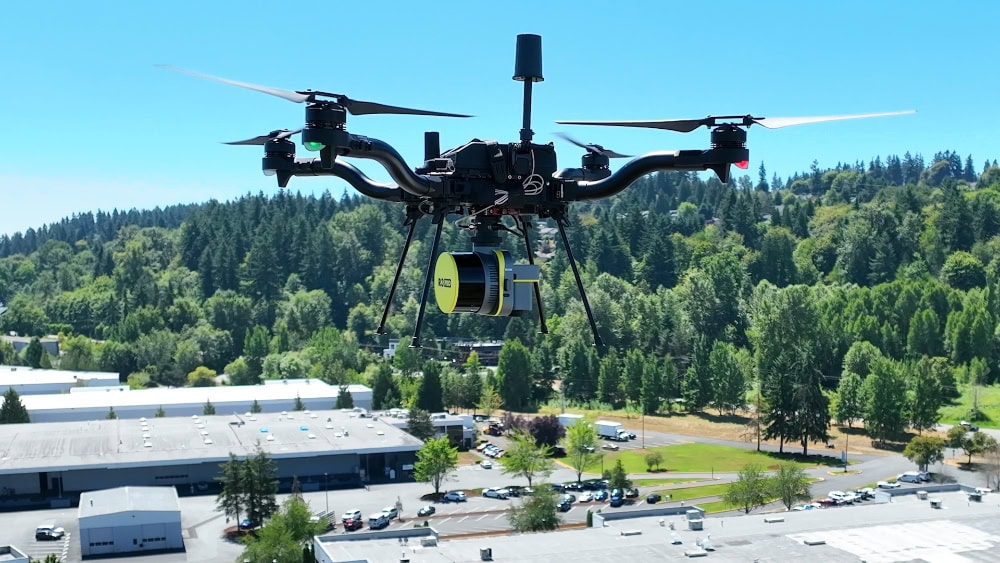
Credit: Freefly
ROCK Robotic’s LiDAR payload has an integration kit made specifically for the Freefly Astro platform, making it a solid domestic option for drone LiDAR.
- Why it’s a fit. Ecosystem approach with payload integration support
- Best for. Teams prioritizing flexibility and non-DJI options
- Things to know. Workflow quality depends on end-to-end integration (mounting, positioning, processing)
How to Capture LiDAR Data
LiDAR succeeds when the sensor has a clear “line of sight” to the surfaces you care about from enough angles to build a dense, consistent point cloud.
Plan predictable coverage and don’t rush the pattern—tight spaces, overhangs, and vertical faces often need extra passes or a different approach angle to reduce occlusions.
Here are best practices to follow:
- Plan for coverage first. Identify the surfaces that matter—ground, vegetation, structures—then design passes that reduce occlusions.
- LiDAR can’t scan what it can’t see. This means tight spaces, overhangs, and vertical faces often require additional viewpoints.
- Fly consistently and give yourself time for the full pattern.
As with photogrammetry, gaps in coverage are hard to fix later without re-flying.
If you’re doing a complex site, it’s usually better to capture an extra pass than to discover missing data after you’ve packed up.
Drone LiDAR Software
LiDAR workflows are usually point-cloud-first.
A typical pipeline looks like: import the dataset, validate coverage, clean obvious noise/outliers, and (often) classify points so the data is usable downstream—for example, separating ground, vegetation, and structures.
From there, you export the point cloud deliverable and optionally generate derived products like surfaces or meshes when the stakeholder needs something more visual.
The right software for processing LiDAR data depends on whether you’re staying inside a single hardware ecosystem or delivering to a client’s GIS/engineering toolchain. In many cases, you’ll use one tool for processing and another for QA and inspection.
Here are some of the top software options for creating drone 3D models with LiDAR:
1. PIX4Dsurvey
PIX4Dsurvey is a desktop tool built to bridge point clouds and CAD-style deliverables, letting you work from a LiDAR (or photogrammetry) point cloud and extract only the information you need.
It can import external point clouds in common LiDAR formats like .LAS and .LAZ, which makes it a practical option when your “LiDAR deliverable” needs to become usable linework or vectors, not just a raw point cloud file.
- Best for. Turning LiDAR point clouds into CAD-ready vector deliverables (feature extraction and simplification)
- Things to know. Imports external LiDAR point clouds (.LAS/.LAZ) and is focused on extracting/working with point clouds rather than being a full LiDAR processing ecosystem
- Good fit if. Your client needs usable vectors/features from LiDAR data (not just a point cloud handoff)
2. DJI Terra
DJI Terra is a practical choice when you’re operating within DJI enterprise workflows and want a single tool for processing LiDAR outputs and related deliverables.
- Best for. DJI enterprise LiDAR capture-to-processing workflows
- Things to know. Strongest fit when your hardware and workflow are DJI-aligned
- Good fit if. You want an integrated, supported pipeline
3. ArcGIS Pro
ArcGIS Pro is commonly used when LiDAR deliverables are going into GIS analysis and mapping workflows.
If your client is a GIS team, confirming their expected formats and handoff requirements here can save a lot of back-and-forth.
- Best for. GIS analysis and organization of LiDAR-derived data
- Things to know. Most valuable when the client already lives in GIS
- Good fit if. The deliverable is being used downstream for GIS-based work
4. CloudCompare
CloudCompare is a free desktop tool that’s widely used for point cloud inspection, basic cleaning, and comparison.
It’s especially useful for QA: checking coverage, spotting noise, and understanding what you actually captured.
- Best for. Point cloud inspection and quality checks
- Things to know. Powerful but can feel technical at first
- Good fit if. You need a no-cost way to review deliverables
Drone 3D Model Delivery
A lot of clients don’t have a 3D workflow.
That means that, if you hand them a massive file with no context, you’ll spend more time doing tech support than delivering value.
The goal is to make the model easy to review while still preserving a high-quality “master” for anyone who needs the full data.
Most Delivery Issues Are Viewer Issues
Even a technically correct model can become a problem if the stakeholder can’t open it.
Assume the person reviewing your deliverable is busy and non-technical, and make the “first open” experience as simple as possible.
Here’s a simple two-output way to think about delivery:
- Save a master export for archiving and technical use. This version will have the highest detail and full fidelity.
- Then create a shareable version that’s lighter and easier to open on normal hardware.
This approach can help avoid a lot of “I can’t open it” emails from clients.
Export Formats + What to Deliver
Before you export, make sure you understand what your client is looking for—do they want a visualization or do they want to make measurements?
Based on the answer, use this chart to decide what to deliver:
| Client goal | Deliver this | Common formats | Include this so it works |
|---|---|---|---|
| View and share—most non-technical clients | Textured mesh (shareable) | GLB/GLTF, sometimes FBX/OBJ | Textures embedded or included; one-line “how to open” note |
| Measurement—most engineering clients | Point cloud (often master) | LAS/LAZ, E57 (workflow-dependent) | Clear units/scale expectations; confirm required format before exporting |
| View and measure | Both: mesh + point cloud | Mesh + point cloud formats above | Label files clearly (VIEW vs MASTER) and document what each is for |
Client Delivery Checklist
Meshes commonly export as a model file plus texture images. If the textures don’t ship with the mesh, or aren’t embedded, the model can look gray or “broken” even when the geometry is fine.
Also include one short line that tells the client what they’re looking at and how to open it.
Here’s a quick checklist for delivering drone 3D models to clients:
- Deliverable summary: what’s included and what each file is for
- Viewing instructions: one clear sentence (file + viewer or link)
- Shareable vs master labels: make it obvious which file is which
- Scale/units note: especially if measurement is involved
- Texture packaging: confirm textures are included and referenced correctly

A drone 3D model of Alcatraz
6 Common Problems with Drone 3D Models + What To Do
When a 3D model fails, the cause is almost always in the data collection, or even before the data collection: missing coverage, inconsistent capture, or deliverables that don’t match the method.
Photogrammetry can’t create detail it never saw, and LiDAR can’t scan what it can’t “see.”
Here are 6 common problems with drone 3D models, along with how to diagnose them and whether you can salvage the dataset or need to re-fly.
1. Holes, Missing Walls, or Missing areas
This is usually a coverage problem.
In photogrammetry, it often shows up when vertical faces were under-captured (i.e., nadir-only flights).
In LiDAR, it shows up when occlusions (trees, overhangs, tight spaces) block the sensor from scanning certain surfaces.
Do this: add viewpoints. For photogrammetry, capture obliques and/or a structured orbit so walls are seen from multiple angles. For LiDAR, add additional passes or a different approach angle to reduce occlusions.
2. “Melted” Geometry, Warped Edges, or Drifting Alignment
This is commonly caused by motion blur, weak overlap, inconsistent altitude/camera angle, or big lighting/exposure changes between passes.
The software can’t match features reliably, so geometry degrades.
Do this: slow down and stabilize capture. Re-fly with steadier speed/altitude, stronger overlap, and more consistent camera behavior. If you’re salvaging, remove the blurriest images and reprocess.
3. Noisy or “Fuzzy” Point Clouds
LiDAR point clouds can look fuzzy when you have noise/outliers, insufficient density for the target, poor coverage angles, or movement from things like vegetation in wind.
Some noise is normal, but heavy noise makes deliverables harder to use.
Do this: run a cleaning/QA pass and check density. Remove outliers/noise, validate coverage, and if the scene demands it, re-fly with tighter line spacing, steadier speed, and better viewpoints (especially for vertical faces).
4. Textures Look Smeared or Stretched
Harsh shadows that change between photos, reflections, and uneven coverage can confuse texturing.
Even if the mesh is acceptable, the texture can look distorted where the software had poor image choices.
Do this: improve consistency and reduce glare. Capture in more even lighting when possible, add coverage so the software has more options for each surface, and avoid relying on photogrammetry for reflective/transparent areas.
5. Water, glass, shiny cars, and glossy roofs break the model (photogrammetry-heavy)
Reflections change with viewpoint, and transparent surfaces don’t provide consistent features. Photogrammetry often fails here or produces unstable geometry/texture.
Do this: reframe the deliverable. Model the surrounding structure instead of the reflective surface, fly in overcast conditions to reduce glare, or choose a deliverable that doesn’t depend on reconstructing reflective/transparent areas.
6. The Deliverable Is Too Big / Client Can’t Open It
This is usually a packaging and delivery planning issue, not a capture issue.
Dense meshes and LiDAR point clouds can be huge, and many stakeholders don’t have the tools to open them.
Do this: deliver two versions. Export a MASTER (full-fidelity) and a VIEW (lightweight/shareable) version, label them clearly, and include one sentence on how to open the shareable file.
Quick Salvage Checklist
Before you re-fly, try this:
- Photogrammetry. Remove blurry images and major exposure outliers, then reprocess and check problem areas first.
- LiDAR. Validate coverage and density, then remove obvious noise/outliers and re-check the areas that matter.
- Both. If gaps are caused by occlusions or missing viewpoints, a re-fly with better angles is usually the fastest fix.
Want to Download a 3D Model of a Drone?
If you want a downloadable 3D drone asset for rendering, animation, games, AR, or mockups, you don’t need photogrammetry or LiDAR.
You need a model file that fits your software and a license that fits your use.
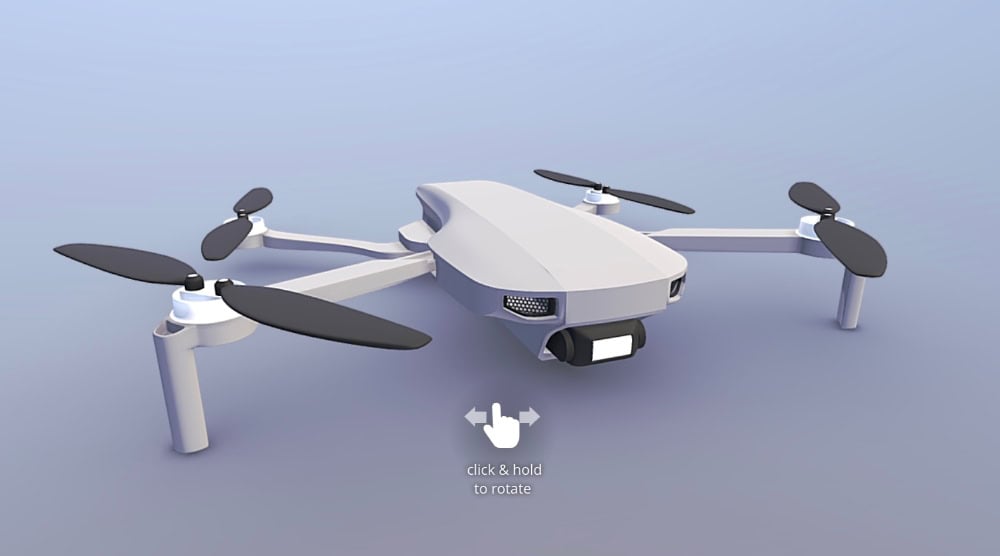
A 3D model of a drone made by user Kira on Sketchfab
Trusted starting points
- Sketchfab – Drone models. Best for previewing models in-browser, checking licenses, and downloading common formats.
- CGTrader – Drone 3D models. Strong marketplace for paid assets, with lots of file format options and varied quality levels.
- TurboSquid – Drone 3D models. Large, established marketplace—useful when you need highly specific models or pro-grade assets.
Download checklist
Do this so you don’t regret the file you grab:
- License: confirm commercial use is allowed (and whether attribution is required).
- File format: match your pipeline (common: OBJ, FBX, GLB/GLTF).
- Textures included: verify texture files are included (or embedded) so it doesn’t import as a gray model.
- Polycount: choose the right complexity for your use (real-time vs offline rendering).
- Scale/units: check units and dimensions after import before you build a full scene.
- Topology quality: confirm it’s clean enough for your use (especially if you’ll animate or subdivide).
- Rigging/animation: if you need moving props or cinematic shots, confirm the model is rigged (or plan to rig it).
- Preview before committing: look for sample renders, wireframes, and included file details if available.
Pro tip: Pick the format based on what you’re doing
- GLB/GLTF: great for web/real-time viewing and easy sharing.
- FBX: common for animation pipelines and many 3D apps.
- OBJ: widely supported for static meshes, often paired with separate texture files.
Drone 3D Model FAQ
Here are answers to some of the most commonly asked questions about making 3D models with drones.
How much image overlap do I need for photogrammetry?
More overlap is usually safer than less. If you’re modeling anything with height or detail, plan for enough coverage that every surface appears in multiple images from multiple positions. If your models keep failing, your first fix is usually more consistent images plus obliques where needed.
Can I use video instead of photos?
Sometimes, but it’s rarely the best starting point. Video frames can work, but they often introduce motion blur, compression artifacts, and inconsistent shutter behavior. For predictable results, capture still images with a deliberate pattern and consistent settings.
Do I need RTK or ground control points (GCPs)?
Not for a good-looking model. But if you need reliable measurement and repeatable accuracy, you’ll want stronger control of scale and positioning. RTK and/or GCP workflows can help, but they add planning and field complexity. Decide based on the deliverable, not the trend.
Can I make a 3D model with drone LiDAR?
Yes. Drone LiDAR commonly produces a highly detailed point cloud, and many workflows can also generate a mesh from that point cloud. LiDAR can be a better fit when you care most about geometry and measurement in challenging environments (like vegetation or low-texture surfaces), while photogrammetry is often the better fit when you want photo-real texture from photos.
Why do buildings look worse than open terrain?
Because walls are vertical and often under-covered. A nadir-only dataset can leave facades missing, which forces the software to guess. Add obliques and make sure each wall is captured from multiple angles.
Why are trees, water, glass, and shiny surfaces so hard?
They don’t provide stable, consistent features across images. Vegetation moves, water reflects and changes, and transparent or reflective surfaces confuse matching. You can improve results with calmer conditions and more angles, but sometimes the correct answer is resetting expectations or changing the deliverable.
My model is huge. How do I share it?
Keep a master export for archiving, then create a lightweight shareable version optimized for viewing. Label them clearly and don’t deliver a heavy file without a viewing plan.