A Drone Pilot’s Guide to ND Lens Filters: Reviewing the SANDMARC DJI Aerial Filter Kit
BY Alan Perlman
6 July 2017Why Do Drone Pilots Use ND Lens Filters?
If your drone footage is a little sluggish, meaning you’re seeing a slight blur or smudge in your shots, or the opposite, where your video is just a little too choppy and pixelated, you may benefit from using an ND filter.
A couple of months ago, I set my DJI Mavic Pro camera to auto instead of using an ND filter. See how the footage looks a little off? That could’ve been smoothed out with an ND filter and proper light control.

It’s all about the 180° shutter angle rule, or this idea that you’re supposed to maintain a specific ratio between your shutter speed and the frames per second (FPS) that you’re shooting in. The reason for this rule is that if the shutter speed is too slow, you’ll get blurred movement. If it’s too high, you’ll get that kind of stop-motion look where it’s a little choppy.
Traditionally, the most common camera setting for professional filmmakers is a shutter speed near 1/48th of a second, and a frame rate of 24 frames per second (FPS).
I’m not saying you need to lock yourself into always shooting drone videos at 24 FPS. But as a rule of thumb, your shutter speed should be double your frame rate.
- If you’re shooting at 24 FPS, you’ll want to set a shutter speed of 1/48th of a second
- If you’re shooting at 30 FPS, you’ll want to set a shutter speed of 1/60th of a second
- If you’re shooting at 60 FPS, you’ll want to set a shutter speed of 1/120th of a second
These ratios don’t need to be exact, but according to the 180° shutter angle rule, they should be close. And when you shoot in auto like I did in the video above, it’s very difficult to get these ratios right! So set your camera to manual and keep reading 🙂
Of course, the 180° rule doesn’t always need to apply. I really like what Ron Dawson has to say about breaking the rule over in this article:
Here are some tips when I think it makes sense to break the 180 degree shutter angle rule.
- Depth of Field: as I just mentioned, sometimes you’ll want to increase the shutter speed to help you attain a shallow depth of field. If it’s super bright outside, stopping up to f2.8 or or f1.4 will totally blow out the visuals. Increasing the shutter speed will reduce the light and compensate for the brightness. There are times when you really do need that shallow DoF and this is a good way to do it. Just don’t go crazy.
- Low Light: sometimes you may be in a setting where the light is pretty low and so using a slower shutter speed will let more light in, helping out. Depending on your camera, this will give your image more of a “dreamy” look. When I shot with traditional camcorders, I’d often shoot at 1/15 or slower because I wanted to get those dreamy streaks. I also used to shoot regularly at 1/30 at 30 fps instead of 1/60 because it gives a softer, more film-like look to traditional video. 1/60th is very “video” looking.
- Epic battle scenes: if you’re shooting epic battle scenes, you may want to use faster shutter speeds to get that staccato look. (I don’t know how many times this may actually come in handy, but at least have it in your arsenal of knowledge.)
Know Which ND Filter To Use
Neutral Density filters range from ND to ND128, with the most common ones being ND4, ND8, ND16 and ND32.
The ND filter that you choose depends on the amount of light around you and the kind of effect you want to achieve, so make sure to experiment flying and recording footage in a lot of different environments to get the best feel for what kind of look you’re wanting to achieve.
The higher the ND number, the more light the filter prevents from coming through the lens.
Here are some notes re: different types of ND filters:
- An ND4 filter reduces light by 1/4. This allows you to slow the shutter speed from 1/100 of a second to 1/25 of a second.
- An ND8 filter reduces light by 1/8. This allows you to slow the shutter speed from 1/200 of a second to 1/25 of a second.
- An ND16 filter reduces light by 1/16. This allows you to slow the shutter speed from 1/400 of a second to 1/25 of a second.
On sunny and brighter days, try using an ND8 or ND16 filter.
On darker and cloudier days, try using an ND4 filter.

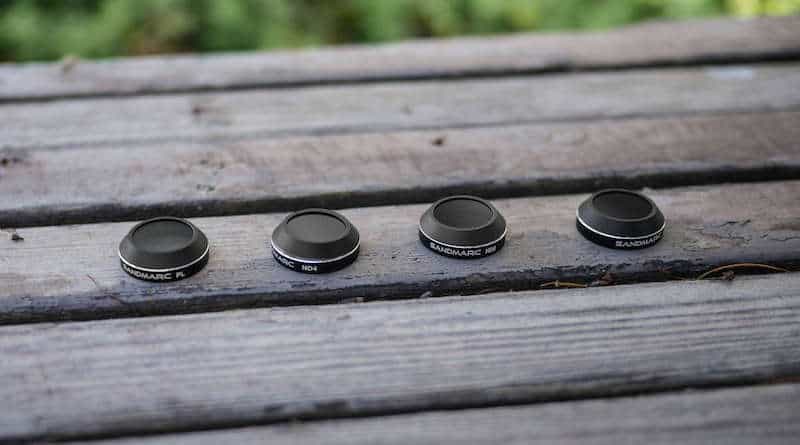
Shot with the SANDMARC Aerial Filters for DJI Mavic Pro
Reviewing the SANDMARC Aerial Filters for the DJI Mavic Pro
As many of you know, I’ve been enjoying my DJI Mavic Pro for its portability and flight intelligence. I’ve been trying to do some more aerial cinematography here and there. Here are some recent videos with footage from South Carolina and Namibia.
I connected with the SANDMARC team, who taught me a bit about their aerial filters and how they’d help me to produce higher quality footage and ultimately to have more flexibility in the types of shots I’m looking to get.
Here were a few takeaways as I began testing out their filters:
- The DJI Go 4 app interface makes it easy to switch from automatic to manual mode, allowing you to easily adjust the ISO, frame rate, and shutter speed, all of which are related to which ND filter you should use to achieve your desired effect.
- Always power down the aircraft before adding or removing an aerial ND filter to avoid damaging the gimbal.
- Even though the filters are light and won’t likely affect your gimbal’s center of gravity and calibration, I always like to re-calibrate the gimbal when adding or removing an ND aerial filter. It can’t hurt, right?
- Play around with the Polarizer filter! It’s great for minimizing glare and increasing color saturation on bright, sunny days when shutter speed isn’t an issue.
If you’re looking to level up your aerial cinematography efforts, then consider buying a set of aerial filters to give you more flexibility to control your camera.

I enjoyed flying with the SANDMARC aerial filters and getting to know their team.


